In today's tutorial, we'll guide you through the process of changing a paper feed roller kit on the Xerox VersaLink B625. If you're experiencing paper feed issues, this step-by-step guide will help you replace the feed roller kit efficiently. Let's dive into the details.
To learn about common printer terminology, read our blog on the 56 common printing terms.
Section 1: Feed Wheel Replacement
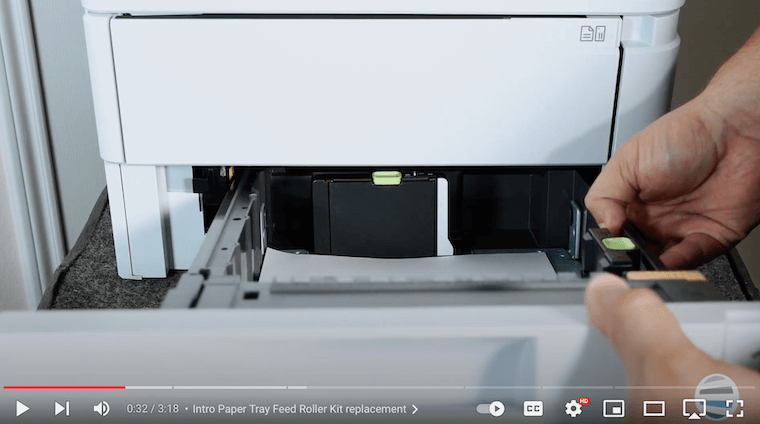
Step 1: Remove the Paper Tray
The first step in the process is to remove the paper tray. Unlike older Xerox models, the VersaLink B625 requires you to lift the paper tray upward at an angle and pop it out. This reveals the pickup assembly, where the paper feed rollers are located.
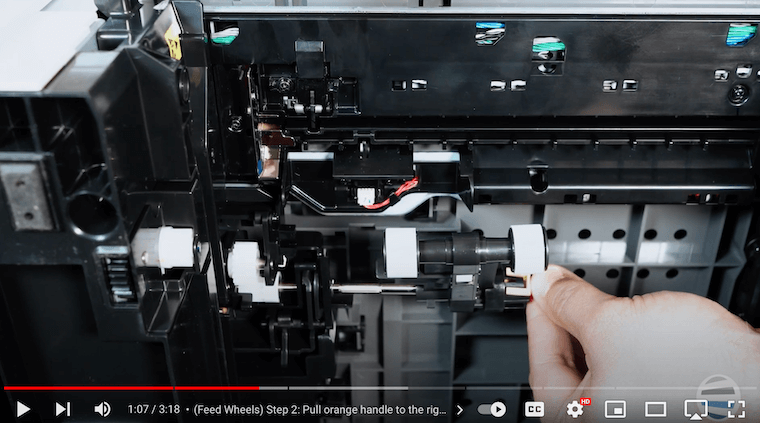
Step 2: Remove the Feed Wheels
Inside the pickup assembly, locate the orange handle and pull it to the right. This action will release the feed wheel assembly, allowing it to swing down. Continue moving the assembly to the right until you hear a snap. Slide it off the shaft to expose the feed wheel pickup assembly.
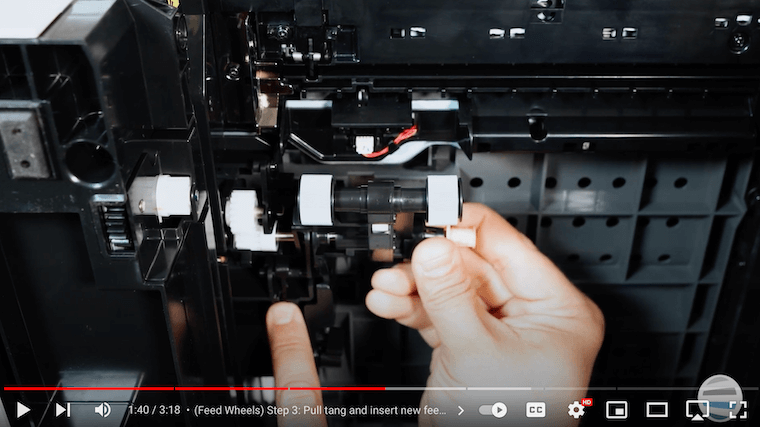
Step 3: Insert New Feed Wheels
To insert the new feed wheel pickup assembly, keep it standing straight up with the orange handle to the right. Before sliding it all the way to the left, be attentive to a little black tang. Gently push down on the tang while swinging the assembly up and all the way to the left. You'll hear a click as it locks in place. Release the assembly, allowing the black tang to spring back into place.
Section 2: Separator Roller Assembly
If your kit includes a separator roller assembly, follow these steps.
Step 1: On the Paper Tray, Push in the Orange Handle and Lift Up
Push in the orange handle on the paper tray and lift upwards to remove the assembly. Pull straight out. This is your separator roller assembly which has two little black pieces of rubber.

Step 2: Insert New Assembly Back in Paper Tray
Insert the new assembly back into the paper tray by aligning the dowel with the small hole on the left side and swinging the gray assembly back down. Click it in place.
Step 3: Reinsert the Paper Tray
After completing the necessary replacements, reinsert the paper tray at a slight angle, making contact, and then slide the drawer down while giving it a gentle push inward. Your paper feed roller kit replacement is now complete!
Want to know more about the cost of maintaining a printer? Check out our blog on how much printer/copier supplies cost.
Ensure Print Quality by Replacing Your Paper Tray Feed Roller Kit
Understanding the paper feed roller replacement process for your Xerox VersaLink B625 is a game-changer for seamless printing. Our comprehensive guide walked you through each step, ensuring you can bid farewell to paper jams and enhance your overall printing experience. Efficiently replacing your paper feed roller kit translates to uninterrupted workflows, increased productivity, and the longevity of your printer. By taking charge of maintenance, you not only save time but also preserve the quality of your prints.
Want to Watch More Helpful Guides?
If you want to elevate your printing game, head to The Printing Workshop for more quick how-to videos on the Xerox VersaLink B625 and similar models. Empower yourself with knowledge and ensure your printing operations run smoother than ever before. If you found this guide useful, please show your support by liking and subscribing to our channel.
If you have printer issues that can’t be easily fixed through guides, contact us, our experienced printer technicians can help answer your questions.
