Welcome back to The Printing Workshop! We understand that changing the transfer belt assembly on your Xerox VersaLink C7020/C7025/ C7030 can be a daunting task. That's why we're here to help you every step of the way. In today's tutorial, our technician, Matthew, will provide you with a detailed guide on how to complete the process with ease and confidence. We know that you may have struggled with this task before, but don't worry – we're here to assist you and make it as simple as possible.
By the end of this tutorial, you'll have the knowledge and confidence to do transfer belt assembly replacement on your own.
But first, if you want to learn more about the Xerox VersaLink C7030, read our comprehensive review on its pros, cons, and cost.
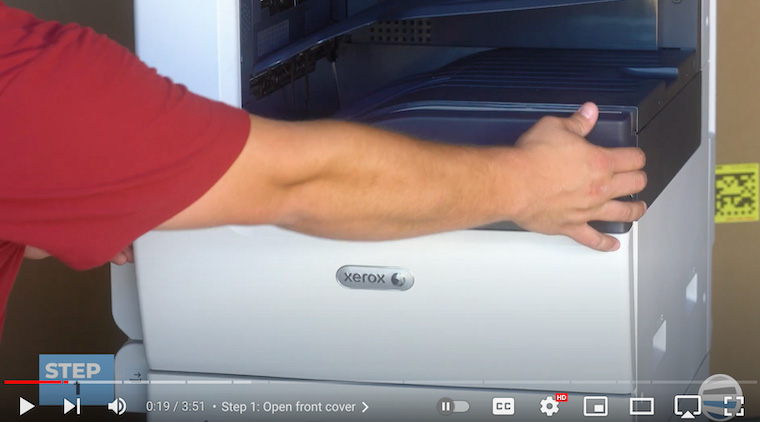
Step 1: Open the Front and left Side Cover
Begin by opening the front cover of the printer. Then, lift the gray handle to open the left side cover. The transfer belt assembly is located right behind the waste cartridge labeled R5.
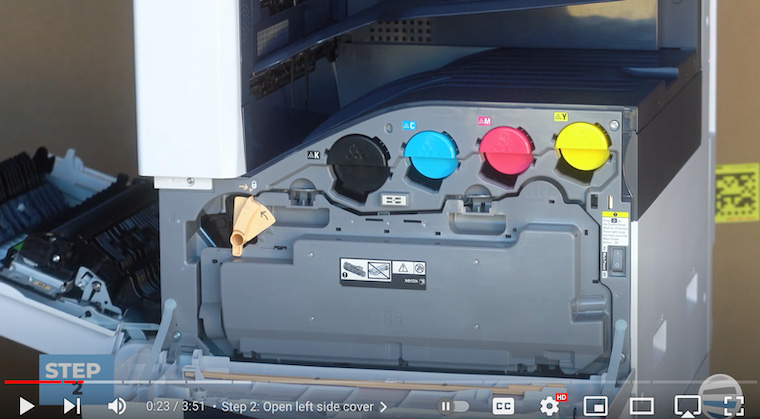
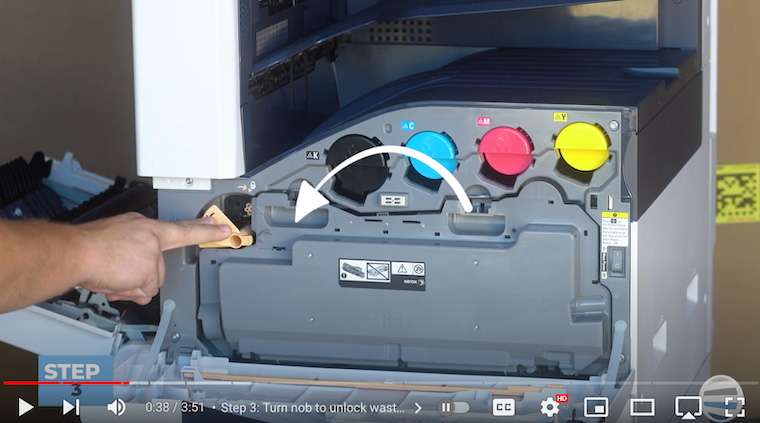
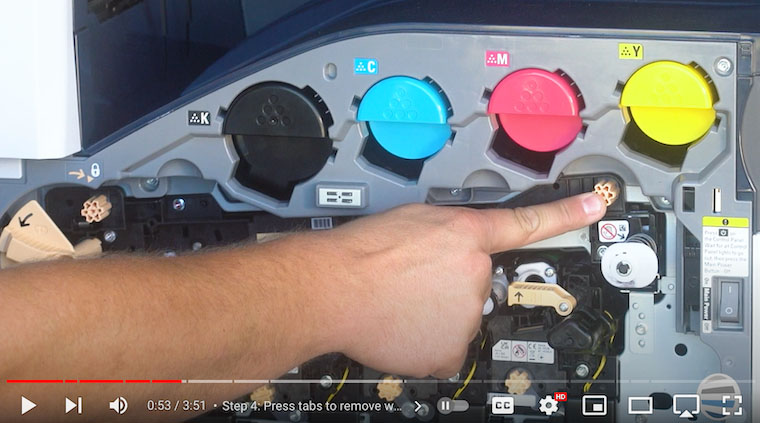
Step 2: Unlock and Remove Waste Cartridge
To unlock the waste cartridge, turn the orange latch to the left side.
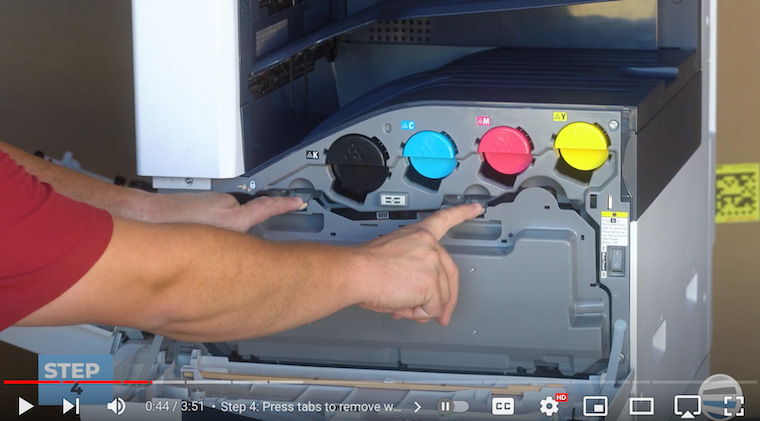
Then push down on the two orange tabs on top of the waste cartridge. Roll the waste cartridge away to unveil the transfer belt assembly (labeled R6).
Step 3: Remove Two Finger Screws
To access the transfer belt assembly, unscrew two orange thumb screws. Turn them counterclockwise to ensure they are loose and ready for the next step.
Step 4: Pull Out Transfer Belt Assembly
With the thumb screws loose, pull the assembly out by its handle (R6) and stop about halfway through until you can fully see two orange handles.

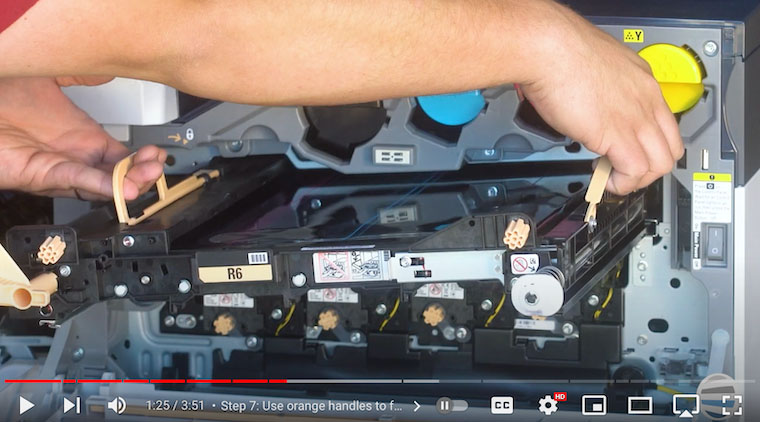
Step 5: Use Orange Handles to Fully Remove Assembly
Use the orange handles on both ends to pull the transfer belt assembly out entirely. Slide the belt out cautiously, maintaining its level to prevent scratches or punctures.
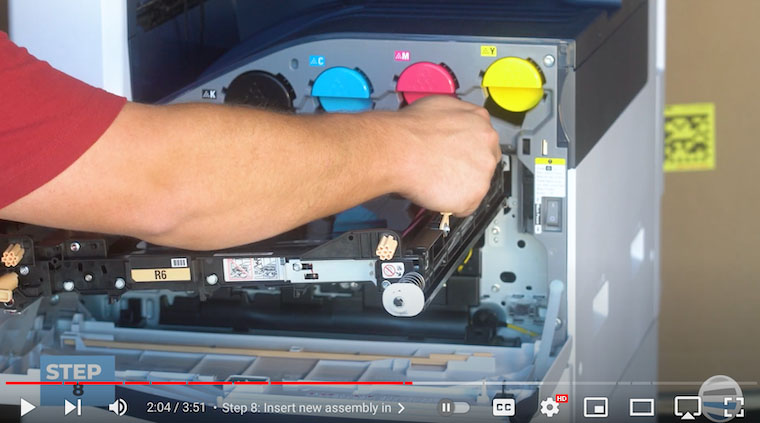
Step 6: Insert New Assembly
Once the old assembly is out, it’s time to install the new transfer belt assembly. Grab the assembly by the 2 orange handles. With the gears toward the back, smoothly insert the assembly back into its slot. If it helps, you can go in with the right side first and then push in the left side. Slide the assembly in as far as you can, then let go of the orange handles and push the assembly in where it says ‘R6’.
Step 7: Re-insert Finger Screws
After successfully inserting the new assembly, re-insert the orange thumb screws by turning them clockwise. Barely push on them until you feel them grab the threads. Then you can tighten them until they are snug, but not too tight. Careful threading is crucial to avoid any potential issues like cross-threading.
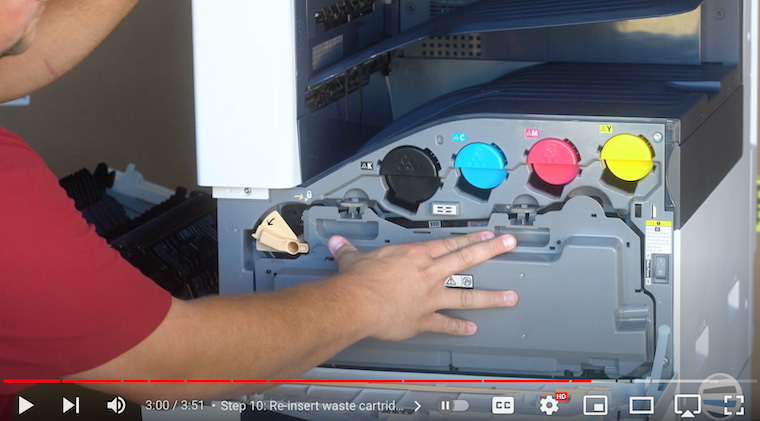
Step 8: Re-insert the Waste Cartridge
Following the replacement, place the waste cartridge back into position and push it into place until you hear a click to ensure a secure fit. Make sure the orange latch is turned to the right to lock it in place.
Step 9: Close Left Side Cover
Close the left side cover, making sure both front and rear latches are securely closed.
Step 10: Close Front Cover
The final step involves closing the front cover and completing the transfer belt assembly replacement process.
Master Xerox VersaLink C7030 Transfer Belt Assembly with Confidence!
As we conclude this empowering journey, you've not just learned to replace the transfer belt assembly in your Xerox VersaLink C7020/C7025/C7030; you've gained mastery over a crucial aspect of your printing world, thanks to the expertise shared by Matthew. This isn't merely a fix; it's a game-changer for your printing experience.
We understand the frustrations that come with printer maintenance. This guide is your ally, giving you the confidence to navigate transfer belt assembly replacement with ease.
Take these newfound skills and let them redefine how you interact with your printer. No more uncertainty—just seamless, optimal performance. Embrace the satisfaction of knowing you're in control.
Read about why investing in a maintenance plan for your multifunction printer is beneficial.
Discover More Valuable Tips with Us!
Now is the time to put your newfound knowledge into action. Don’t forget to stay tuned for more helpful tutorials from The Printing Workshop YouTube channel. By liking, subscribing, and sharing this resource with your fellow printer enthusiasts, you can also help them achieve hassle-free printing. Your journey towards becoming a printing expert has only just begun!
Are you struggling with a complex printer issue? Don't let it get in the way of your productivity. Get in touch with us now, and we'll connect you with a trained technician from STPT who will help you resolve the issue quickly and efficiently.
