Drums are an important component of laser printers and need to be replaced periodically. If your Xerox PrimeLink C9065 printer is due for a drum replacement, don't worry as the process is simple enough for you to do with the right instructions. Our printer technician, Matthew, will guide you through the process step-by-step so that you can follow along and get back to your work. Note that this guide can be used to replace the drums on the Xerox PrimeLink C9070, C60, and C70 models too.
In case you are wondering, a drum is responsible for transferring toner onto the paper and needs to be changed when it reaches the end of its lifecycle. The signs that indicate it's time to change the drum include faded or uneven print quality, ghosting or repeating marks on the page, and or an error message indicating a drum problem.
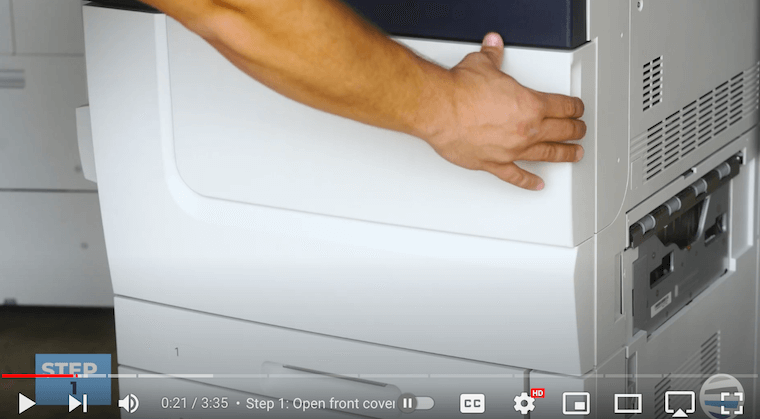
Step 1: Open the Front Cover
To begin the drum replacement process, open the front white cover of the Xerox PrimeLink C9065. You'll find a handle on the right side – simply swing it open.
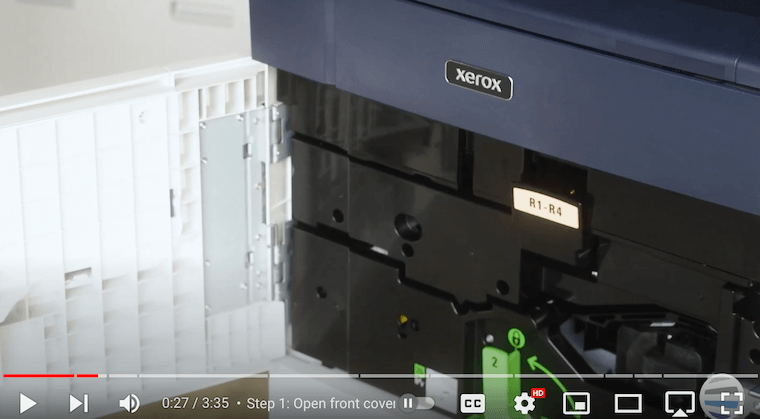
Step 2: Pull the Orange Latch with R1 on It
Look for an orange latch labeled R1 through R4. Pull down this latch (first picture below) to reveal yet another latch (second picture below) with a thin orange line. Grab this latch and pull it up. This action will release the drum tray slightly.
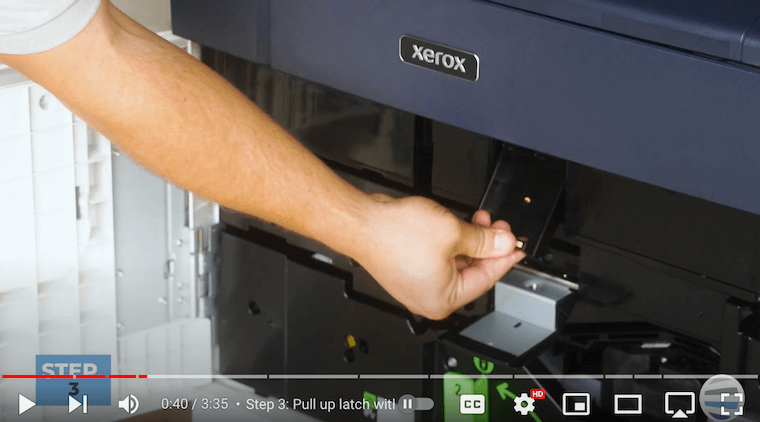
Step 3: Pull the Drawer All the Way Out
Using the latch with the thin orange line, pull the drawer all the way out. This gives you access to the drums.
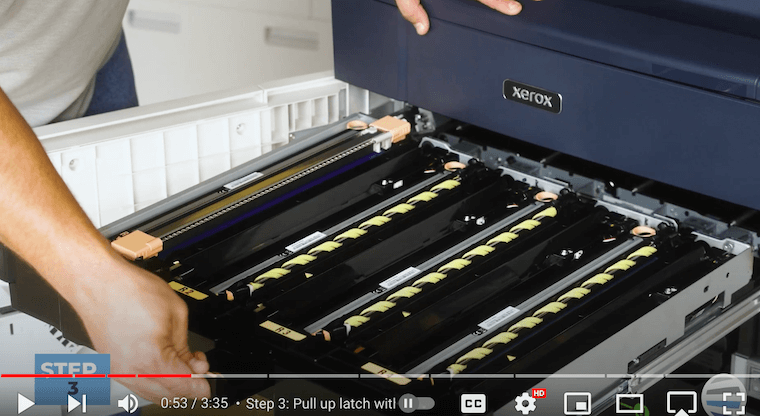
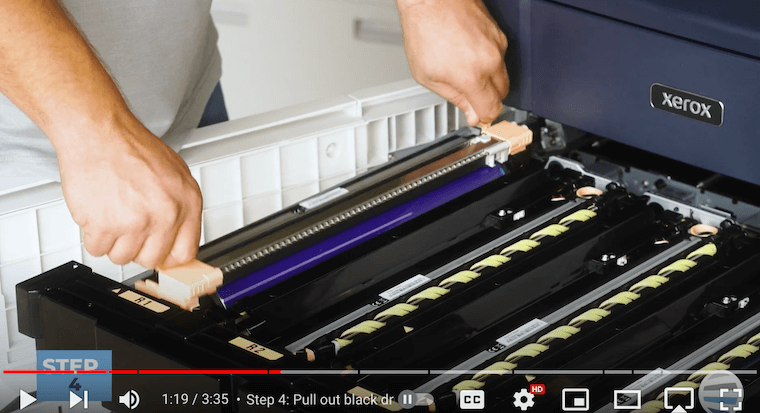
Step 4: Pull Out the Black Drum by the Handle Loops
Identify the R1, which is the black drum. There are two small handle loops on the black drum – insert your fingers through them and pull them straight up to fully remove the black drum. Be cautious not to touch the purple surface to avoid image quality issues.
Step 5: Insert the New Black Drum
Insert the new black drum into the R1 slot using the handle loops again. Align the guides on each end of the drum with those on the tray and push it down gently.
Step 6: Pull Out the Color Drums by Handle Loops
Repeat a similar process for the color drums (R2, R3, and R4). These drums have handles as well – pull them up carefully to remove them. The color drums will offer more resistance but give them a good pull.
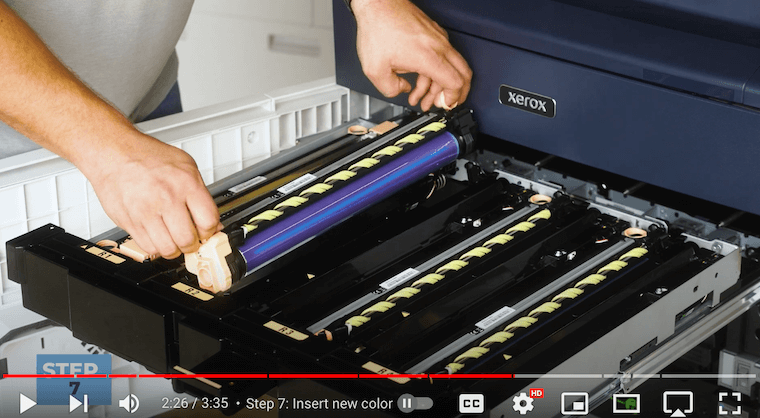
Step 7: Insert the New Color Drums
Carefully insert the new color drum into the tray, aligning the guides. When going back in, you will encounter resistance, but gently push down. The springs on the side will accommodate the drum into the drawer.
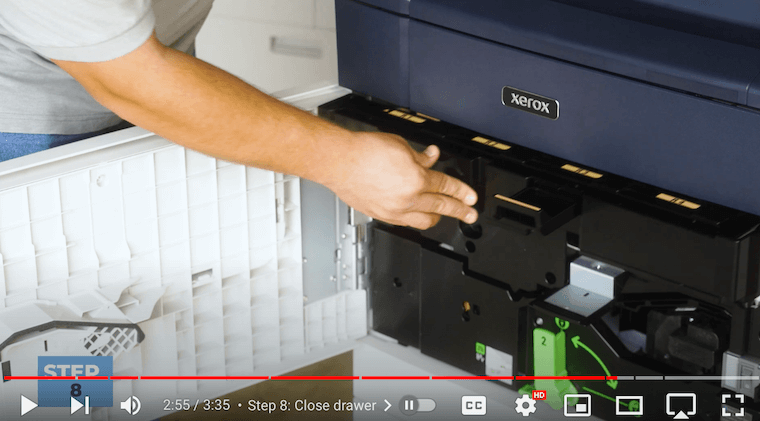
Step 8: Close the Drawer
After inserting the new drums, close the drawer by pushing it straight in. Ensure that the drums are securely in place.
Step 9: Close the Top & Bottom Latch
Close the top latch all the way down. Next close the bottom latch (pictured below) fully. The latch might hang out a bit, but that's normal. This ensures that the drum tray is securely in place.

Step 10: Close the Front Door
Finally, close the front door of the Xerox PrimeLink C9065. Congratulations, you've successfully changed the drums!
Drum Replacement for your Xerox PrimeLink C9065 Made Easy
Replacing the drums on a Xerox PrimeLink C9065 may seem daunting, but with this guide, you can confidently navigate the process. If you care about the health of your Xerox printer, it is important that you understand how to perform basic maintenance tasks like drum replacement. Luckily, STPT’s Matthew has you covered with his easy-to-follow instructions that anyone can do. When handling the drums, remember to be careful and avoid contact with sensitive surfaces.
If you’d like to know how to increase your printer’s longevity, consider our blog on 8 tips to increase the lifespan of your copier/printer.
Ready for More Resources?
If you found this guide helpful, be sure to explore our Learning Center for more informative how-to guides. Additionally, you can subscribe to our YouTube channel, The Printing Workshop, to access insightful videos on a range of Xerox printer models and other printer topics.
In case you encounter any printer-related issues, please don't hesitate to contact us. Our qualified technicians are always available to assist you in finding a solution.
