Replacing parts on time is important for the health of your printer, and replacing the maintenance kit can get a little complicated.
As a service technician at STPT, I’ve made it my mission to simplify printer maintenance. My how-to quick printer fixes on YouTube have been a big hit, so I wanted to provide a quick, easy-to-read tutorial for those of you who prefer written directions.
It may be complicated, but the installation process doesn’t have to be difficult. Take the pressure off yourself and trust me and my fellow print experts at STPT to help you through it. With almost 40 years in the business, our team has the expertise to make the replacement process quick and easy for you.
Most people think replacing their printer maintenance kit is a hassle, but it only takes a few minutes. In this blog, I’ll explain how to quickly change the maintenance kit on several different Xerox printer models so you can get back down to business.
Quick Maintenance Kit Replacement for a Xerox VersaLink C400 Series Printer
A printer maintenance kit contains replacement parts for your machine. Every printer model has its own replacement interval for parts determined by the number of pages printed.
Typically, the maintenance kit for a Xerox VersaLink C400 series printer is a long-life item, which means it rarely needs to be replaced. This maintenance kit usually yields about 100,000 pages before ever requiring a replacement.
However if your maintenance kit is damaged and requires a replacement, this how-to guide will help.
In this how-to guide, we’ll be looking at how to replace a maintenance kit for the following compatible Xerox printer models:
- VersaLink C400
- VersaLink C405
- Phaser 6600
- WorkCentre 6605
- WorkCentre 6655
Let’s uncomplicate printer maintenance by walking through the transfer unit replacement step-by-step.
This process involves multiple steps, including the assembly and disassembly of several key moving parts, like the transfer belt and roller.
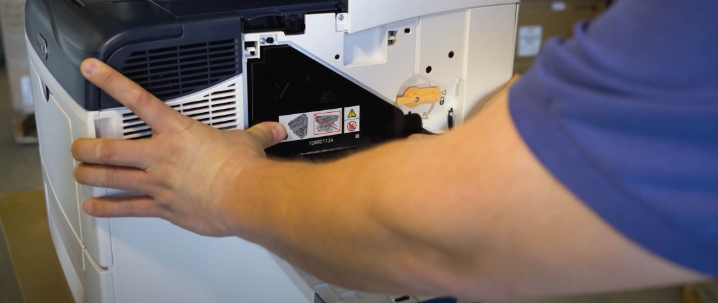
Part One: Replace the Second Bias Transfer Roll (BTR)
You want to start by removing the old BTR. After you’ve removed the old roll, you’ll be able to replace it with the new one from your printer maintenance kit.
- Open the back cover on your printer by pressing down on the latch and letting it fall open (0:34).
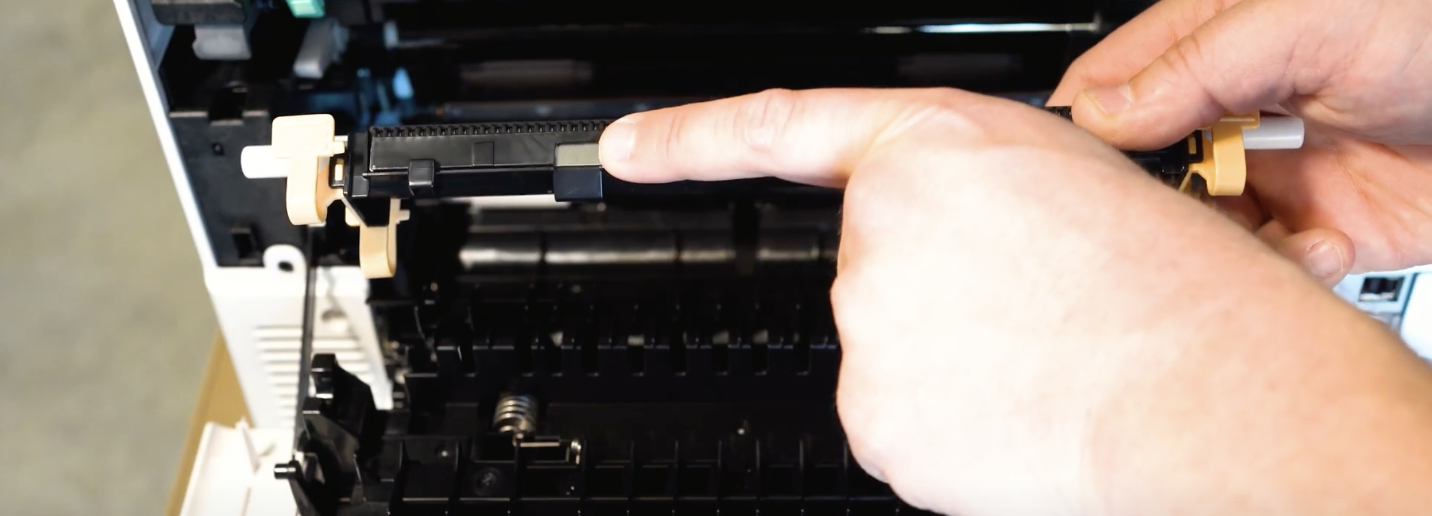
- There should be four little orange tabs at each corner of the roll. Put your fingers on each tab, squeeze them together, and pull straight up to remove the BTR (0:42).
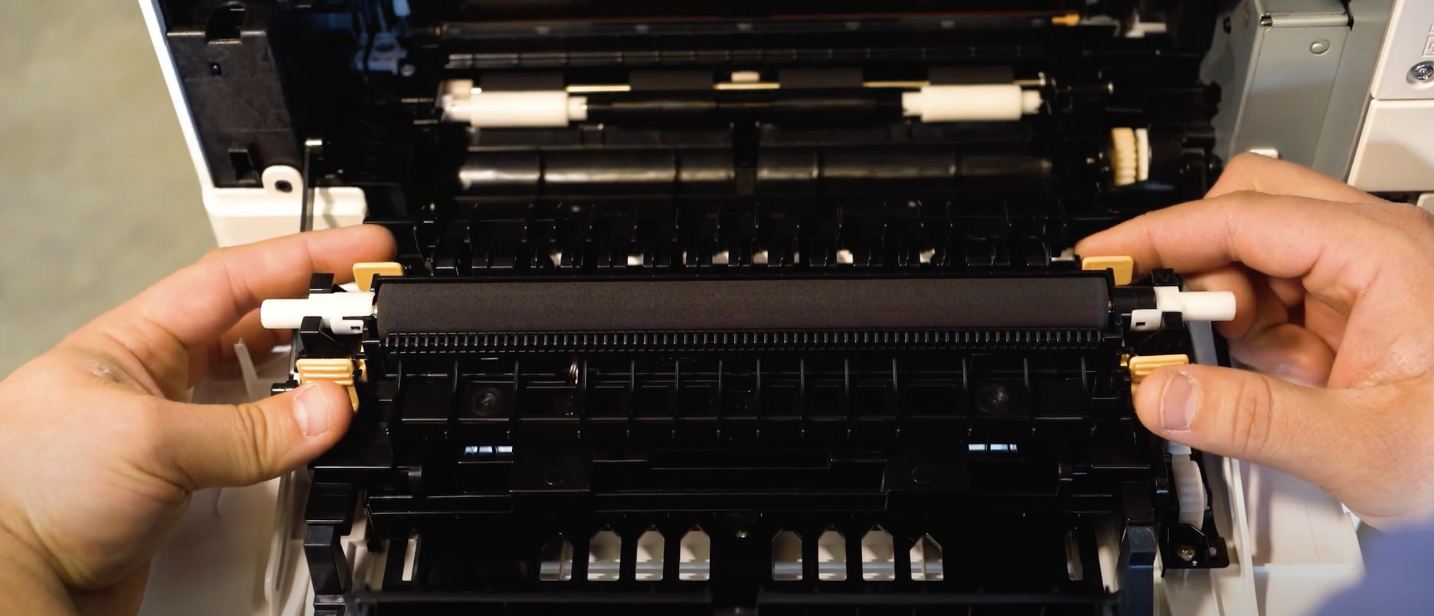
- To put a new maintenance kit in, it’s the same exact process: the orange tabs are offset so the tabs that go towards the machine are closer together, and the tabs that point away from the machine are farther apart
There is also a silver electrical contact on the backside of the BTR. The electrical contact will touch the silver spring in the BTR slot when you insert the new roll. Once you’ve set the new roll in, give it a little push down. You should hear and feel all four of the tabs latch.
When you’re done, you’ll close the back cover and move on to the roller in the printer tray.
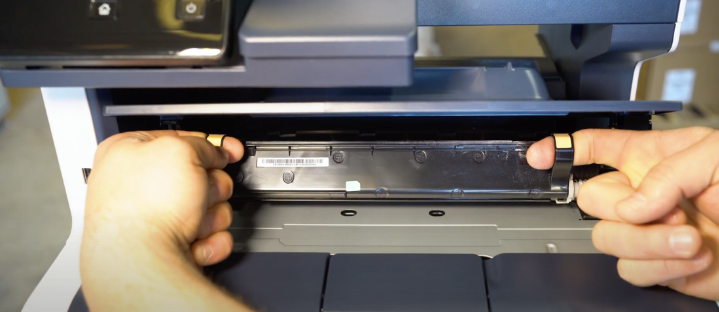
Part Two: Replace the Roller
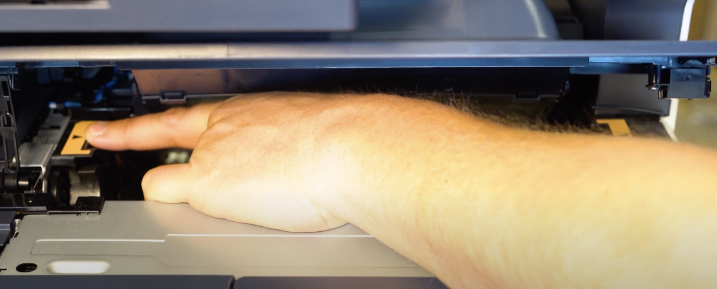
- For this portion of the replacement process, you start by pulling the printer tray all the way out of the drawer. Locate the assembly area at the back of the printer tray (1:44)
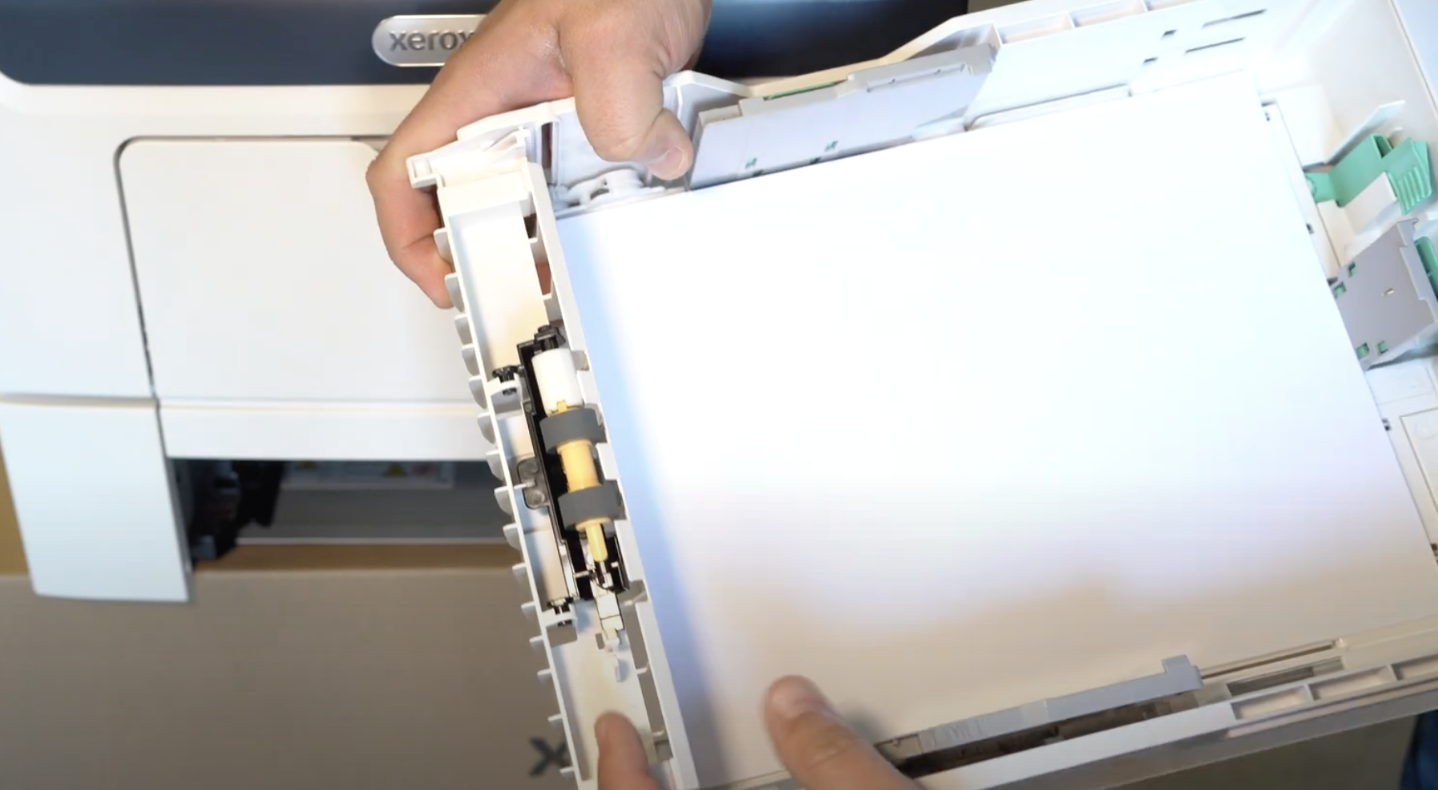
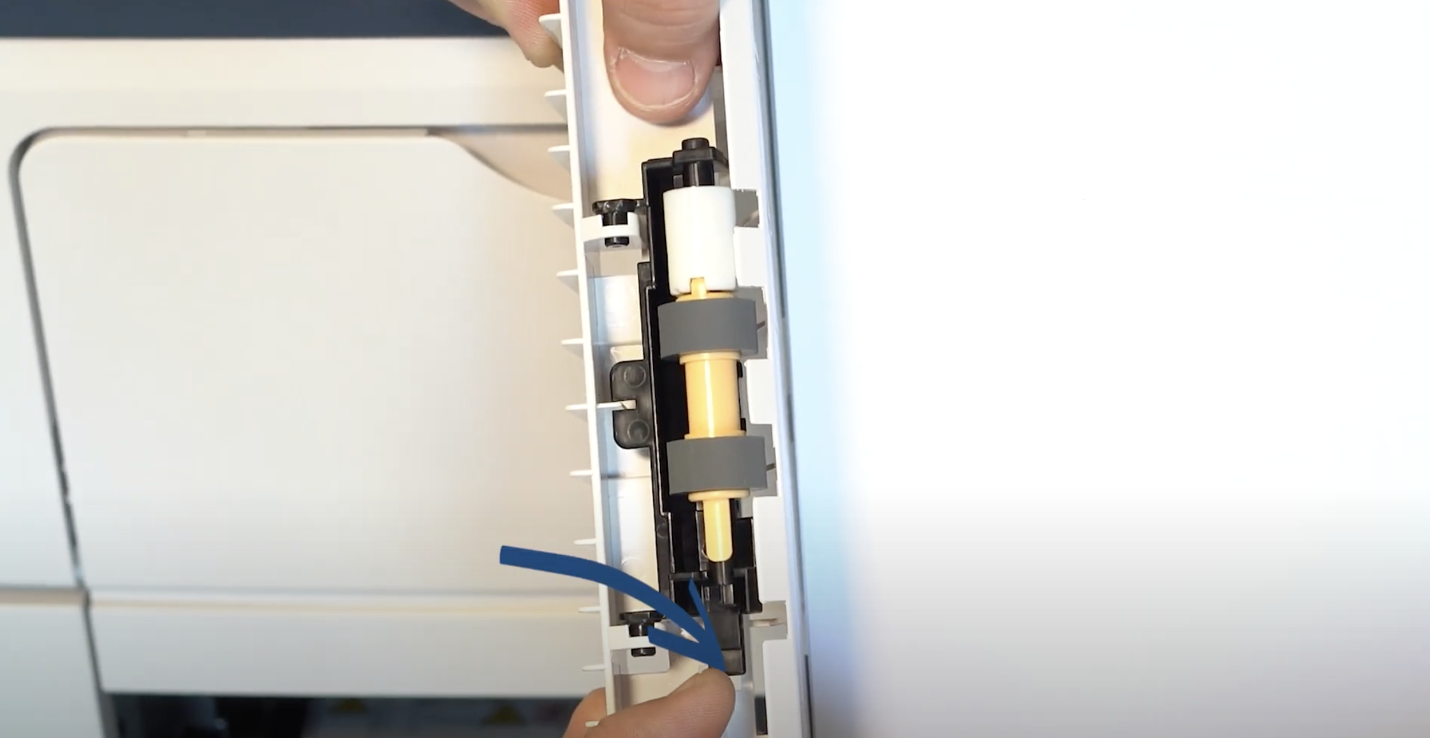
- Press the white tab and pull the black roll out. Lift the roll up and slide it out to the right to remove the roll from its slot (1:59).
- To put the new roll in, you will line up the new roll in the slot at the back of the tray. Then slide it up and to the left. Push the roll down until the white tab re-latches. Put the printer tray drawer back in, and that’s it (2:17).
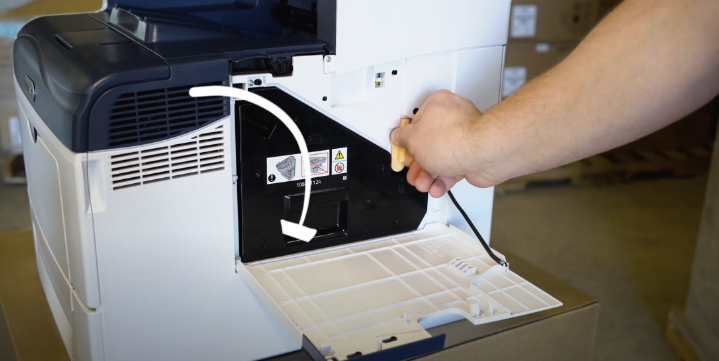
Part Three: Replacing the Transfer Belt
The last part of this installation is replacing the transfer belt. This process involves opening several covers on your printer.
- The first thing you need to do is open the right side, top, and back covers on your printer (2:39).
- After removing the side cover, take out the toner waste container by unlocking the latch and pulling straight out on it. Set the toner waste container aside (2:49).
- Now you will remove the old transfer belt and assemble the new transfer belt from your printer maintenance kit. Look inside the front part of the machine where you’ll see two handles that have orange tabs. Stick your fingers in the handles connected to the tabs and lift the transfer belt straight out (3:19).
- To put the new transfer belt back in, you will find the two orange stickers with black arrows. The arrows show where the guides are on the frame of the machine.
 You have to guide the metal bushings on the edge of the transfer belt. Hold it by the handles with your fingers and stab it straight in. Set metal bushings where the orange stickers are. Once it’s in, let gravity do the rest. You’ll give it a little push and you’ll feel it latch in the front and the rear (4:11).
 - Go back to the side of the machine with your waste toner container and place it back inside. Press firmly to seed it properly. Make sure it latches in the front and the rear, then lock the side cover using the orange lock mechanism on the right (4:24).
- Close the rear cover first. After that, you will close the top cover and then the side cover. It is important to close the top cover before the side cover so your Xerox machine covers close properly.
I think that about covers it. Your maintenance kit should be properly installed so you can get back to work without any printer maintenance hassles.
Need Another Quick Printer Fix?
If you want to make your printer’s maintenance quicker and easier, check out our YouTube channel.
The Printing Workshop gives you free access to all our YouTube video tutorials. Let our service technicians and print experts walk you through simple tech solutions for your Xerox printer.
Have a Problem with Your Copier Printer that isn’t a quick fix? Reach out to us. We’d love to help.