Greetings, printer enthusiasts! In this article, Matthew, our trusted Xerox tech educator, is embarking on a crucial journey through the intricacies of maintaining your VersaLink C400 series printer. In the bustling world of office functionality, where efficiency is paramount, the importance of printer maintenance cannot be overstated. A well-maintained printer is the unsung hero of a smoothly running office, consistently churning out documents and keeping the gears of productivity turning.
Office printers, like any other piece of equipment, require periodic attention and care to ensure they function at their best. In the heart of this maintenance routine lies the often-overlooked task of replacing imaging units. These components play a pivotal role in producing high-quality prints, making them an essential part for the printer's overall performance.
Step 1: Open the Side Cover
The first step in replacing imaging units is to open the side cover of your printer. Located conveniently on the side of the machine, this cover provides access to the internal components essential for the replacement process.
.png)
Step 2: Unlock and Remove the Waste Toner Container
Unlock the waste toner container by turning the orange handle up to the unlocked position and pulling it straight out. Set it aside, as we'll need to access the imaging units located within.
.png)
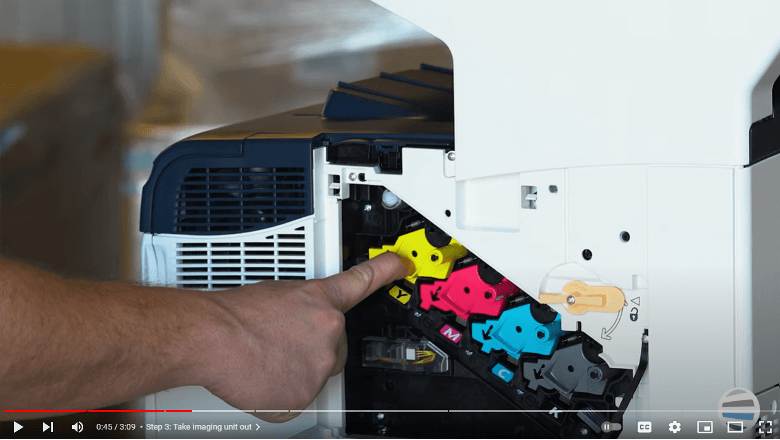
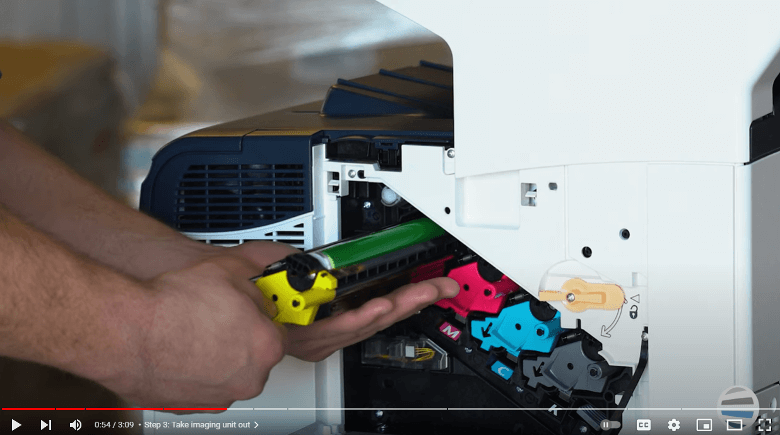
Step 3: Take Out the Imaging Unit
Inside, you'll find four imaging units. Locate the handle with the arrow indicating the direction to push. Gently push down on the handle, allowing the imaging unit to release. Support the unit from underneath to prevent it from falling. PRO TIP: Do not touch the green surface!
Step 4: Unboxing the New Imaging Unit
Prepare the new imaging unit by carefully unboxing it. This is a crucial step to ensure the cleanliness and integrity of the new component.
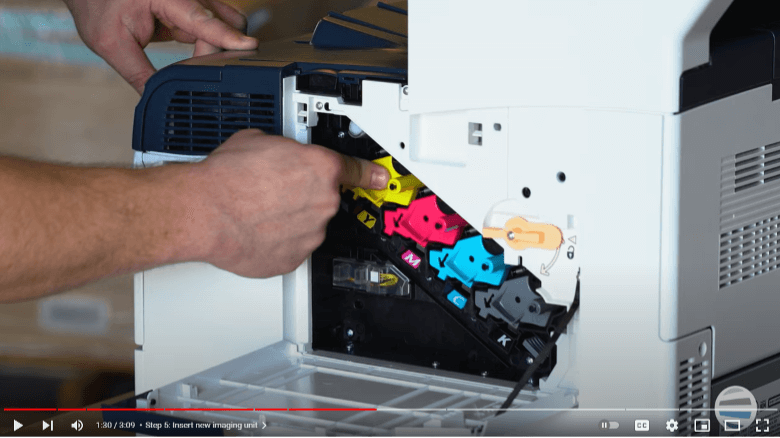
Step 5: Insert the New Imaging Unit
Place the new imaging unit into the designated area inside the frame. Ensure it is set down carefully, and once in position, it should move freely. Slide it in carefully and give it a firm push at the end to lock it in place. Repeat this process for all four imaging units.
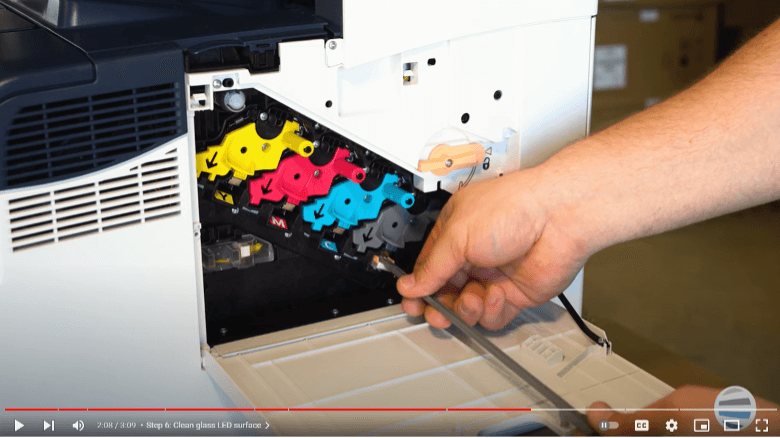
Step 6: Clean the Glass Lenses
After installing the imaging units, it's essential to clean the glass lenses underneath. Use the grey wand found by the black imaging unit and pull out. You will use this same wand for all imaging units. Then with the cloth side down clean the lenses marked with Y, M, C, and K. Repeat the process a few times to ensure thorough cleaning.
Step 7: Relock the Waste Toner Container
With the imaging units in place and the lenses cleaned, reinsert the waste toner container. Ensure it is pushed in flush, lock the orange handle, and close the side door securely.
You're Ready To Go
Congratulations! You've successfully replaced the imaging units on your VersaLink C400 series printer. This routine maintenance will contribute to the longevity and efficiency of your printer. For more how-to videos on this model or quick guides on other Xerox products, check out our channel. Thank you for joining us in the Printing Workshop!
Need Another Quick Printer Fix?
If you want to keep up with your printer’s maintenance and make it quicker and easier than ever, check out our YouTube channel.
The Printing Workshop gives you full access to all our YouTube video tips, tricks, and how to’s. Let our service technicians and print experts walk you through simple tech solutions for your Xerox printer.
Have a Problem with Your Copier Printer that isn’t a quick fix? Reach out to us. We’d love to help.
