Welcome to The Printing Workshop! Our friendly printer technician, Matthew, is here to help you tackle a common printer woe: toner replacement for your Xerox AltaLink B8090 printer.
Toner is the lifeblood of your printer, responsible for transferring images and text onto paper with precision. But your toner cartridge depletes as you print, resulting in faded prints, streaks, or smudges. A printer with low toner is not ideal for your productivity.
This article will walk you through how to replace the toner in your Xerox AltaLink B8090 printer. We promise to make it easy to follow along. So, let's get started.
If you’d like to know more about toner, check out our article explaining what toner is and how long it lasts.
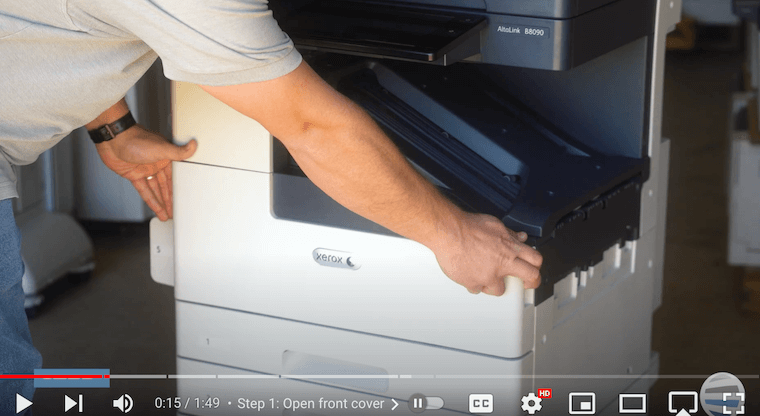
Step 1: Open the Front Cover
First, open the front cover of your Xerox AltaLink B8090 printer. Once you've done that, locate the orange latch inside the printer that holds the toner cartridge in place.
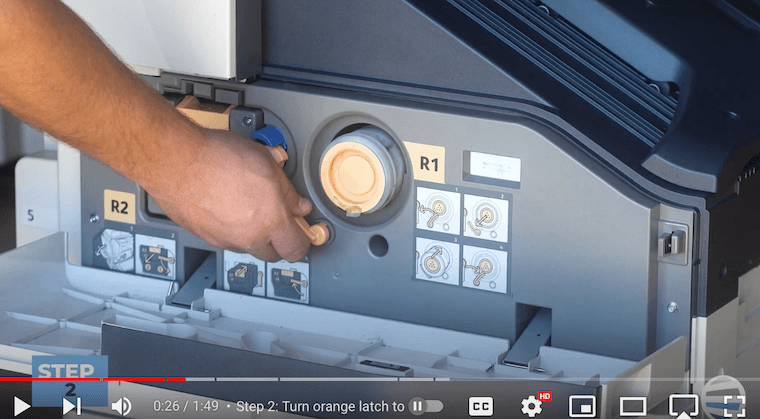
Step 2: Turn the Orange Latch to the Left
Next, grab the orange latch and turn it to the left (or counterclockwise). This will release the old toner cartridge and allow you to remove it from the machine.
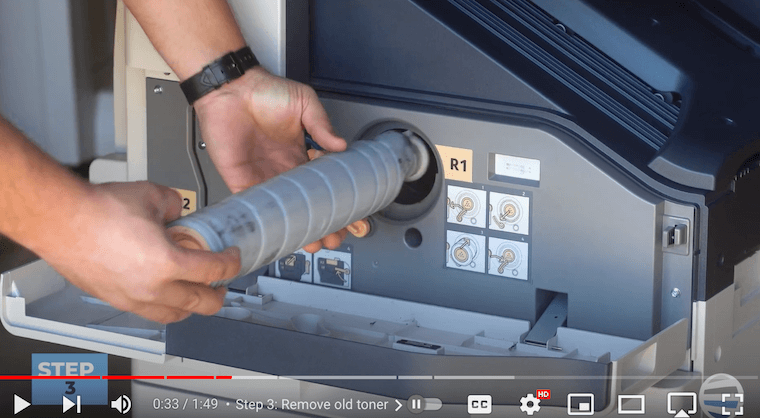
Step 3: Remove the Old Toner
Pull the old toner cartridge out of the machine with the latch turned. Discard it correctly according to your local recycling guidelines.
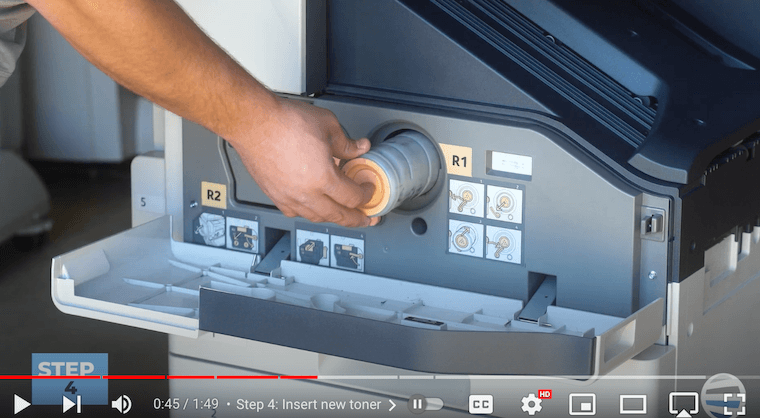
Step 4: Insert the New Toner
Now, it's time to insert the new toner cartridge. Slide your fresh toner cartridge into the printer's designated slot (R1 hole). Push it in until it locks into place. Don't worry if it twists or pushes out slightly when you release it – that's completely normal.
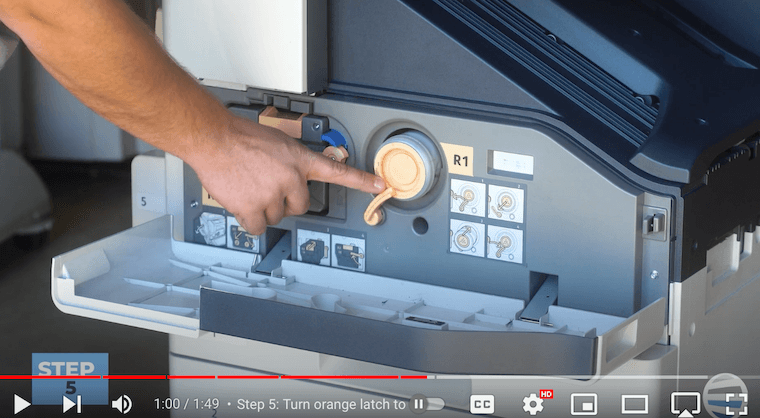
Step 5: Turn the Orange Latch to the Right to Lock
After inserting the new toner cartridge, turn the orange latch to the right (or clockwise) to lock it securely.
Step 6: Close the Front Cover
Finally, close the front cover of your Xerox B8090 printer. Once the cover is closed, you will see a message on the screen asking if you replaced the toner. If you've replaced it with a new toner cartridge, select "Yes." If you've put the old toner cartridge back in, pick "No."
And there you have it – you've successfully replaced the toner in your Xerox B8090 printer!
Toner Replacement for Xerox AltaLink B8090 - Boost Your Print Quality and Productivity
Knowing how to replace the toner cartridge in your Xerox AltaLink printer is crucial for maintaining high-quality prints and avoiding any interruptions to your work. It's essential to monitor your printer's toner-level messages and replace the cartridge when necessary. This way, you can ensure that every print is crisp and professional-looking.
Whether you're a small business owner, a home office worker, or a busy professional, printer problems can be frustrating and disrupt productivity. Learning to perform basic printer maintenance tasks like toner replacement can save time and money and avoid unnecessary hassle in the long run.
Looking for More Tips?
If you want to watch more how-to videos related to printing, you can visit our YouTube channel, The Printing Workshop. You'll join a community of printing enthusiasts who are excited to learn. We regularly post helpful tips and tutorials, so remember to hit the like and subscribe button for more updates.
Is your printer giving you more trouble than you can handle? Please contact us and let our trained technicians help you find a solution.
