Welcome to the Printing Workshop! I'm Matthew, and today, we'll dive into the essential task of changing a scanner maintenance kit on a Xerox VersaLink C505 series printer. This maintenance kit is exclusive to the multifunction versions of the printer and plays a crucial role in ensuring smooth scanning operations.
Read our review of the Xerox VersaLink C505 Printer
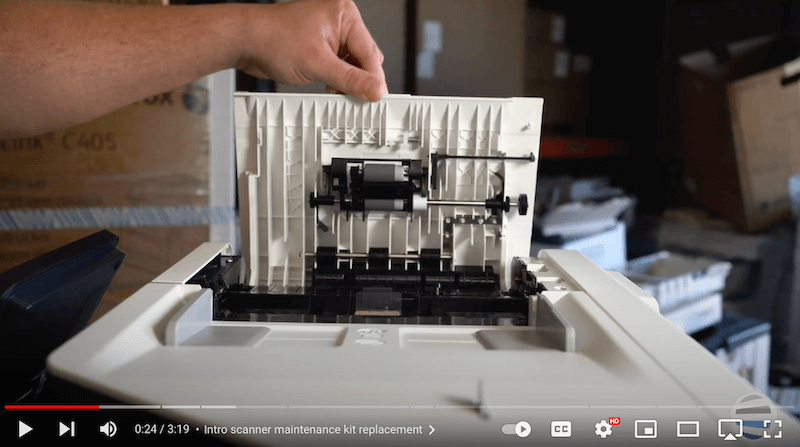
Understanding the Scanner Maintenance Kit
The scanner maintenance kit comprises two key components: the pickup roll assembly and the separator roll assembly. The pickup roll assembly is found inside the top cover, while the separator roll assembly is located within the Automatic Document Feeder (ADF).
Section 1: Changing the Pickup Roll Assembly (Steps 1-4)
Step 1: Open Scanner Cover and Release Latches
To begin the replacement process, open the scanner cover and twist out the latches. These latches secure the pickup roll assembly in place.
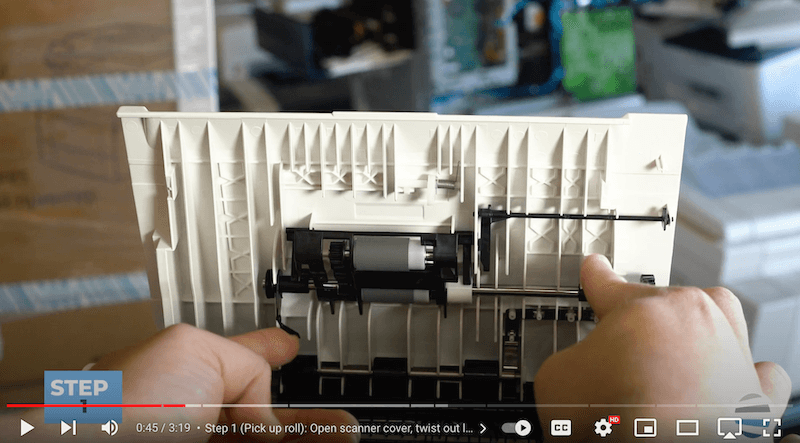
Step 2: Remove Pickup Roll
Gently pull out the pickup roll assembly from the cover. This is a critical step in the maintenance process.
Step 3: Insert New Pickup Roll
Insert the new pickup roll, ensuring it settles into the designated troughs. Secure the roll in place by twisting and locking the handles back into their original positions.
Step 4: Final Adjustments
Press up on the separator assembly and ensure everything is securely in place. This marks the completion of the pickup roll replacement.
Section 2: Changing the Separator Roll Assembly (Steps 1-5)
Step 1: Open Scanner Cover and Lift Black Cover
Access the separator roll assembly by opening the scanner cover and lifting the black cover. Swing it out of the way for easy access.

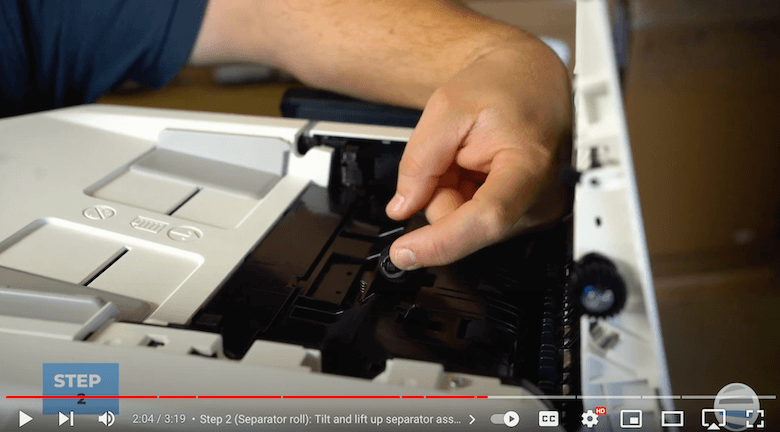
Step 2: Tilt and Lift Separator Assembly
Using your finger, tilt and lift the separator assembly from its position. This is crucial for a smooth replacement process.
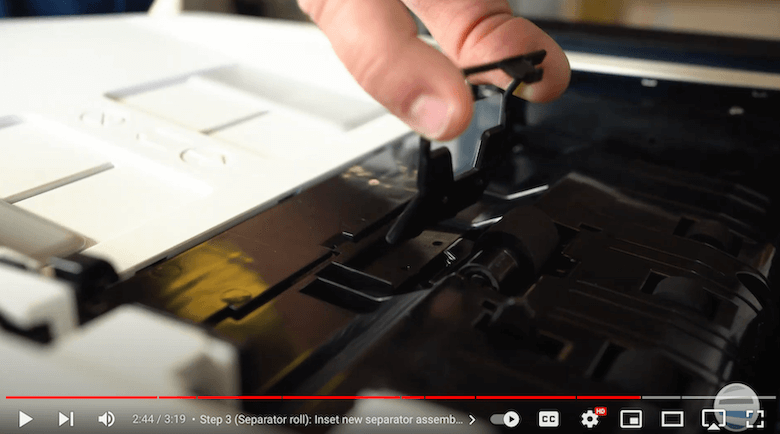
Step 3: Insert New Separator Assembly
Carefully place the new separator assembly into the designated slots inside the ADF. Ensure a secure fit by giving it a gentle push.
Step 4: Reattach Black Cover
Place the black cover with cork back into position, aligning the tangs with their respective holes. Rotate the cover down and push to secure it in the latch area.
Step 5: Final Steps
Close the scanner cover, and you're done! The replacement of both the pickup and separator rolls ensures optimal performance of your Xerox VersaLink C505 series printer.
Keep Your Printer in Top-Notch Condition
Mastering the replacement of the scanner maintenance kit for your Xerox VersaLink C505 series printer is a crucial skill for maintaining peak performance in your office. Our step-by-step guide, led by Matthew, has demystified this process, ensuring that you can effortlessly keep your printer in top-notch condition.
Regular maintenance translates to uninterrupted productivity. By understanding and executing these steps, you're not just prolonging the life of your printer; you're safeguarding your workflow against unexpected disruptions.
To learn about other printer issues, read our blog on the 9 common printer problems and solutions.
Want More Quick Printer Fixes?
Now, take charge of your office equipment's health and longevity. Subscribe to The Printing Workshop for more insightful how-to videos on the Xerox VersaLink C505 series and other essential office devices. Stay tuned for expert tips and tricks to keep your workspace running seamlessly.
Don't let printer maintenance be a daunting task; instead, make it a routine that contributes to the efficiency of your daily operations. Your printer will thank you, and so will your productivity!
Have a Problem with Your Copier Printer that isn’t a quick fix? Reach out to us. We’d love to help.
